
Photo Diary: Building the QD-23 Diffuser by Acoustic Fields
Reading Notes
3-5 Minute Read (Photos) | Laptop or Tablet Recommended
Topics and Themes
Building a QD-23 by Acoustic Fields
Without a doubt, the most time-intensive project to improve my composing studio has been a DiY build of Acoustic Fields’ QD-23. The QD-23 is a massive acoustic diffuser that evenly diffuses all frequencies from 185 Hz to 3.45 Khz. It was totally worth all the pain and difficulties because it sounds dope in my studio, now.
Why on earth did I attempt to build this damned thing? Three reasons.
Reason #1: Acoustics in recording studios are crucial. Taking care to shape the acoustics of a room allows me to feel reasonably confident that a mix will travel well (meaning, it’ll sound good on a lot of different systems). Proper acoustics also ensures a far better chance at clarity and balance.
Reason #2: Diffusion, in general, helps to scatter sound waves evenly throughout a space. The QD-23 works really well when it’s placed behind the person doing the mixing, like on the back wall. I knew that it would allow a deeper, more 3D richness in sound.
Reason #3: I talked my Uncle into helping me with the build. Seeing as how he’s a far better woodworker than I will ever be, I was both shocked and delighted he agreed to help me out.
The process was intense. I knew that I wanted to remember this for the rest of my life, so I kept a photo diary of the process. I’ve published a couple of blogs about this project already, Day 1 and Day 2, but I’ve condenced the entire project onto this blog post so you can see the entire thing, start to finish.
Let’s go!
Day 1
Goal: Cut all wood to the sizes required by the build plans.


Day 2-4
Goal: Stain the wood. I have fewer photos of this part of the process because getting my phone out to take pictures was incredibly difficult with rubber gloves and stain everywhere. The colors did turn out quite pretty:

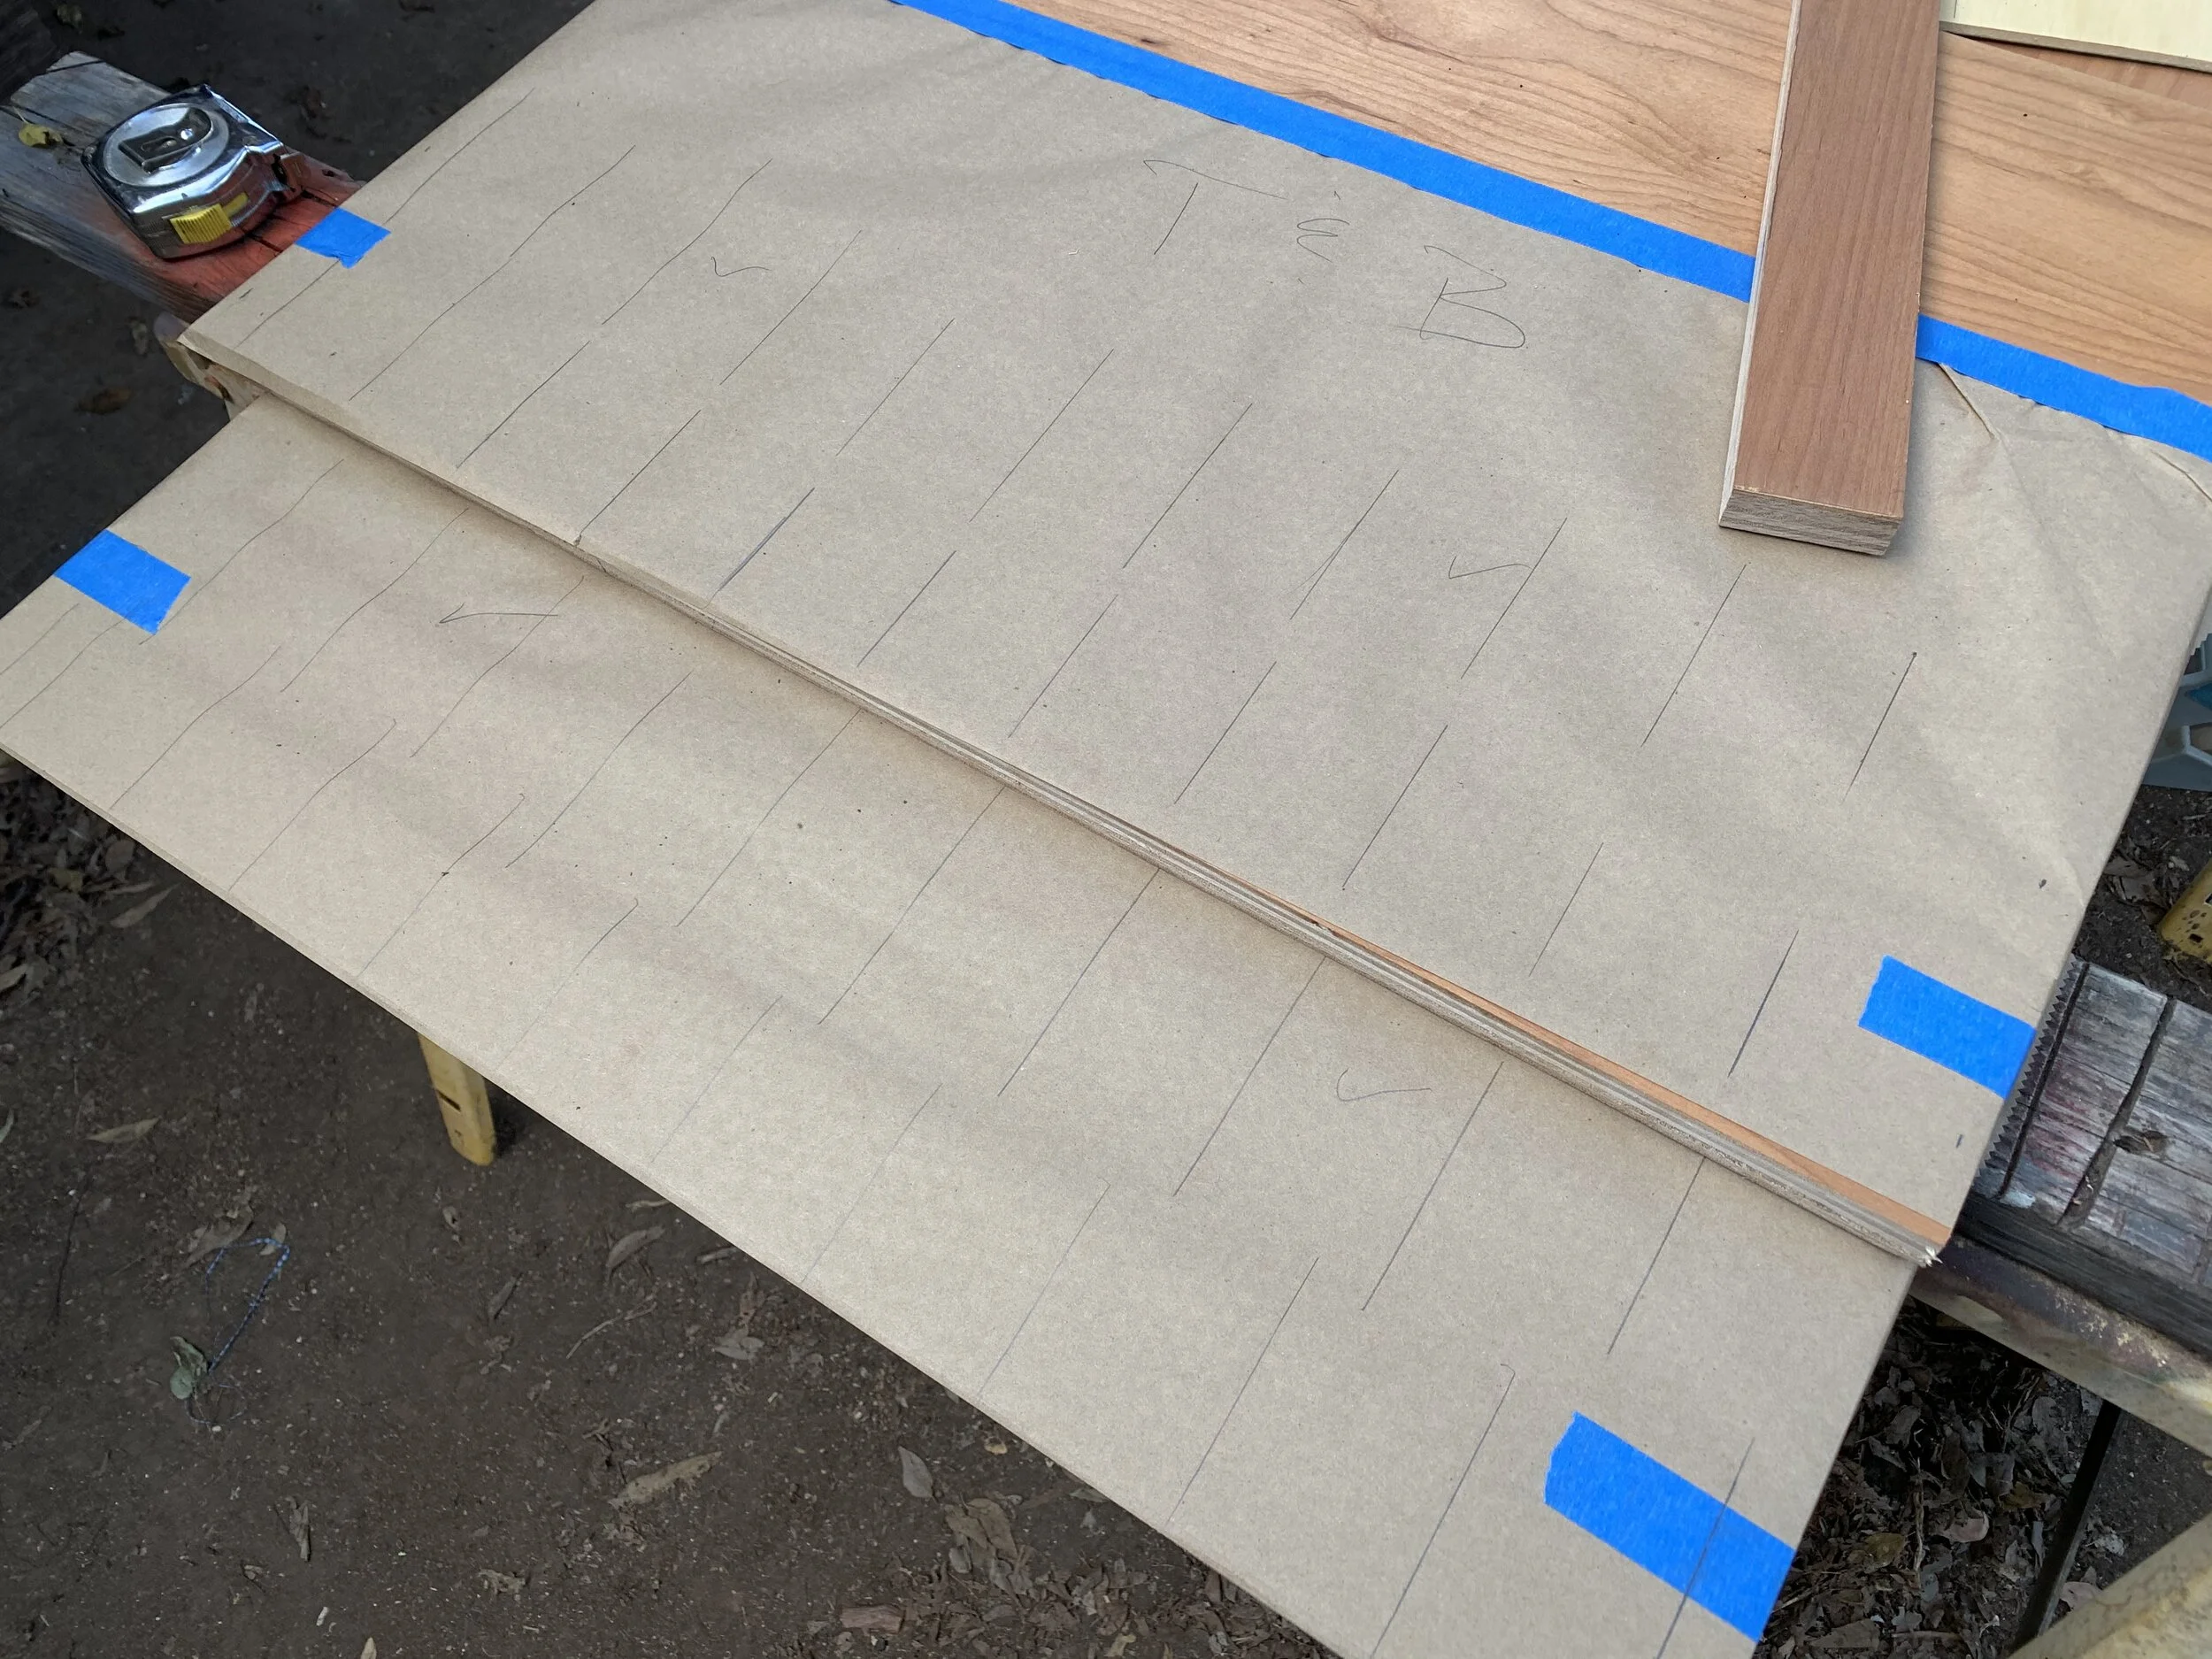
Day 5-6
Goal: Mark the wood for the wells. Not sure what a well is? You’ll see later in the post.


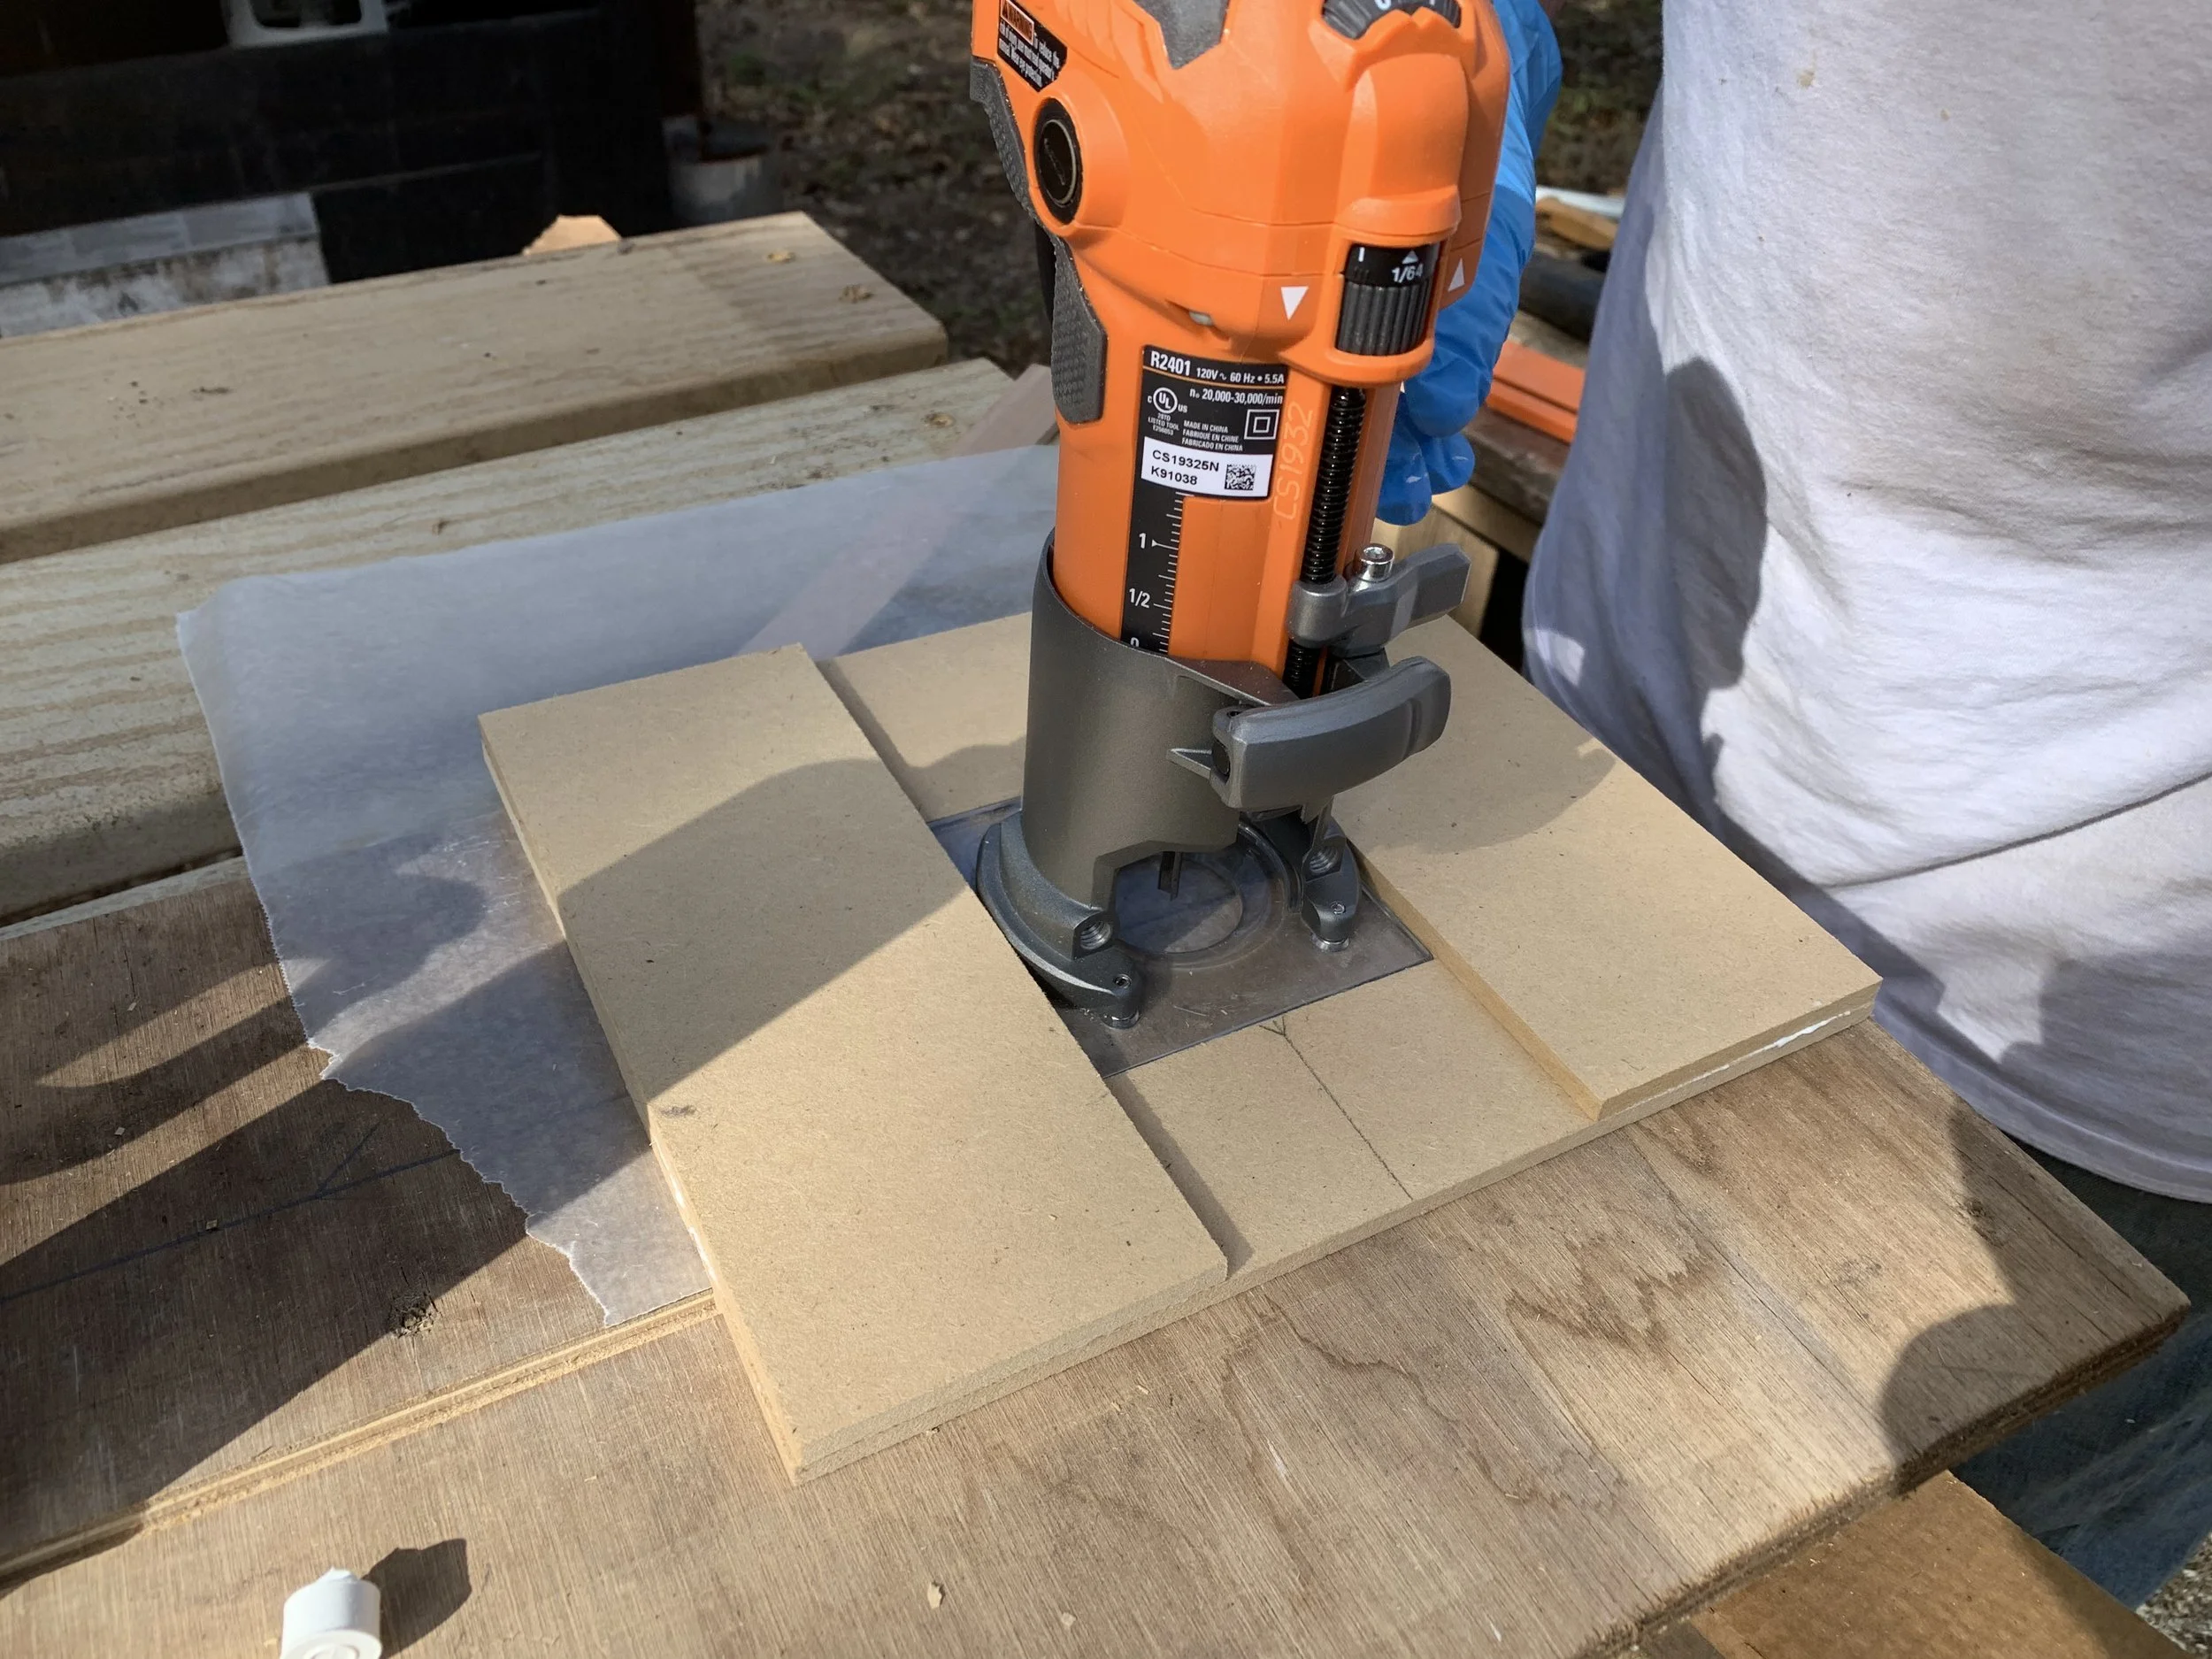
Day 7
Goal: Get the wells routed out and ready for the slats. My Uncle managed to create a jig for the router so that we could get the work done quicker.


Day 8
Goal: Get sides and wells glued into place. This was really fun to do:


Day 9-10
Goal: Get tops on.


Day 11
Goal: Configure the well depths. See the hammer? My Uncle called that his “Persuader.”


Day 12
Goal: Start placing the wells. Each of them was configured to go to different depths. Notice the gnarly things we needed to do to each slat to make sure that it stuck together…


Day 13
Goal: Do a little framing, make a stand, install in studio, be happy!


